Welcome to Mobile App Help
Multi-factor Authentication (MFA)
Yes, you can use Face ID/Touch ID with MFA. If you enable Face ID/Touch ID, you will be able to skip entering an MFA code upon login.
If you have access to your old phone number:
Once you log in to the app, go to Settings and select Change Phone Number. Follow the screen instructions to change your phone number.
If you do not have access to your old phone number:
Don’t hesitate to contact customer support by calling the phone number on the back of your card for assistance. Customer support can help you reset your MFA enrollment factors.
Fuel Locator
Sites with a black pin drop and price banner are locations where the Comdata card is accepted. Sites with yellow pin drops and price banners are offering the lowest fuel price.
A pin drop with a number is called a cluster. Zoom in on the map to see all the fueling locations in that area.
Yes. On the Map View screen, tap on a pin to display a pop-up at the bottom of the screen with information about that location. Close the location details before tapping another pin, and the information will update to reflect the new selection. To close the station information, select the ‘X’ icon.
Fuel prices shown in the app are based on data we receive from our partners. If the data is older than 24 hours, we hide the price for that location to make sure you’re not seeing outdated information.
Sometimes, we do not receive fuel prices from a location, or the prices we do receive are more than 24 hours old. When either event occurs, we will not display fuel prices for that location in the mobile app.
You’ll see a message on the Welcome Screen when a new app version is available for download. If the latest version is a minor upgrade, you can decide when and if you want to update your app. Occasionally, we may need to add new security enhancements. When the new version includes security updates, you must update your mobile app to protect your privacy.
Please ensure you enter the correct information when prompted by the fuel pump or register. If the card still does not work, please contact customer support at the number on the back of your card for more help.
Manage Card
Select the card you want to make your favorite on the Wallet screen. Click Card Settings, click the Set As Favorite Card, and then follow the step-by-step instructions for the Set As Favorite Card option.
Please Note: The heart in the top right corner of a card on your wallet screen indicates your favorite card. Upon logging in, your favorite card will always be the first card on your Wallet screen.
- Click Card Settings on the wallet screen
- Select Change Nickname from the from the available options
- Enter the new Nickname details
- Card Nickname (i.e., identifies card if multiple cards are added)
- Click Submit
- Click OK on the Nickname Changed pop-up message
- Click on the Settings option on the navigation bar at the bottom of any screen.
- Click Update Email Address
- Enter New Email Address
- Confirm New Email Address
- Click Update Email Address
- Click on the Settings option on the navigation bar at the bottom of any screen.
- Click App Settings
- Slide the toggle to the right to Enable Face ID Login or Enable Touch ID Login (only one option appears depending on the capabilities of your phone)
Note: The toggle will turn green when the feature is enabled.
To update your mobile phone number, follow these instructions:
- Log in to the Driven for Comdata Mobile App.
- Select the Settings option.
- Select Update Mobile Phone.
- Enter and confirm the new mobile phone number.
- The cardholder will receive an email with a verification code.
- Enter the verification code.
- Tap and hold the OneClick icon of the card you want to unlock for fueling.
- On the prompting screen, enter the same information you would normally input at the pump’s point-of-sale (POS) device.
⚠️ Note: The POS device at the pump may still ask for this information again. If it does, press Continue. - Tap the camera icon to scan your vehicle’s unit number.
- Verify that the scanned number matches your vehicle’s correct unit number.
- Tap Finish Unlocking.
- If all information is correct, you’ll be redirected to the Home screen, and your card will now show as unlocked and ready to use.
- If there’s an error, check the onscreen error codes to troubleshoot and correct the prompting information.
Fuel Locator
For Merchant and Fuel Types, one option must be selected, but you can switch between merchant and fuel types.
- To reset the filters within an individual category (Brands, Amenities, or Maintenance), select the corresponding button to clear the desired filter.
- To remove all selected filters, choose the Clear Filter option.
- To reset the filters for brands, amenities, and maintenance, select Reset Filters within the map view.
To display your location on the map, you must enable Location Services on your device and then give location permission to the Comdata app from your phone’s Settings menu.
Depending on your phone type, Location Services may be a main menu item under Settings, a sub-menu item under Privacy or Security, or managed independently as a permission under the Apps section. Once you locate the appropriate menu, you can enable Location Services for the Comdata app and then restart it.
Stations offering the lowest fuel prices are marked with yellow PINs on the map.
If the lowest-priced station appears within a cluster, zoom in to view the exact fueling location.
Select the magnifying glass icon located in the lower right corner of the map view. Enter the destination’s city, street, or zip code in the search bar at the top, then click Search. We’ll show you results that closely match your search criteria.
Select a location either from the map or the nearby list found at the bottom of your screen. The station’s address, current fuel price, and available amenities will then be shown.
At the top of the screen, you’ll see five groups you can use to filter your search: merchant, fuel, brand, amenities, and maintenance. Choose a category, then select the options you want to use for filtering. Click Apply Filters. The mobile app will save those selections as your preferences and only display locations that match those criteria.
Merchant Types: Including truck stops, gas stations, convenience stores, lumper, and vehicle maintenance. These filters help users find specific types of sites.
Fuel types: including diesel, DEF, gas, CNG, and LNG. CNG and LNG are not currently available.
One type must be selected for each category, but users can switch types.
Brands include more options and brand logos.
Users will also see the store logo when searching for locations on the map. If a station is not branded, the pin will not display a logo.
Amenities include options such as parking, restaurants, and restrooms.
Maintenance: Includes filters for truck wash and truck repair.
Select Card Type
Select your card below to see FAQs and troubleshooting steps.

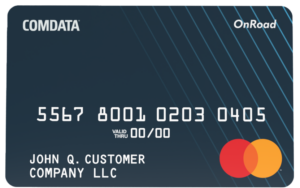
Comdata Card
Use these resources to help you with your Comdata Card.
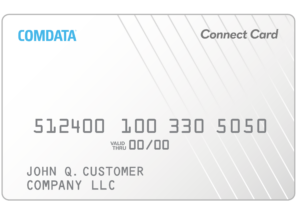
Connect Card
Use these resources to help you with your Connect Card.